Camera and Photos
Use Photos to find and explain existing images; use the receipt scanner to prepare a readable document image. Capturing an image, generating context and saving a business record are separate results.
This review saved and reopened details for a real rehearsal poster in the photo library. It also imported a clearly marked sample receipt into the actual scanner, inspected its detected corners and compared the cleanup modes. It did not capture a live camera image, check in a ticket or create an expense from the sample.
Photo Library
Open Files → Images → Photos. Photos brings images together for browsing, grouping, selection and metadata editing. A useful caption makes an image easier to recognize than an automatically generated filename.
For the private event rehearsal, the selected image is a dark green Garden Jazz poster with a saxophone, gold lettering and leafy branches. Its saved caption is Garden jazz rehearsal poster, with the tags event, rehearsal and poster.
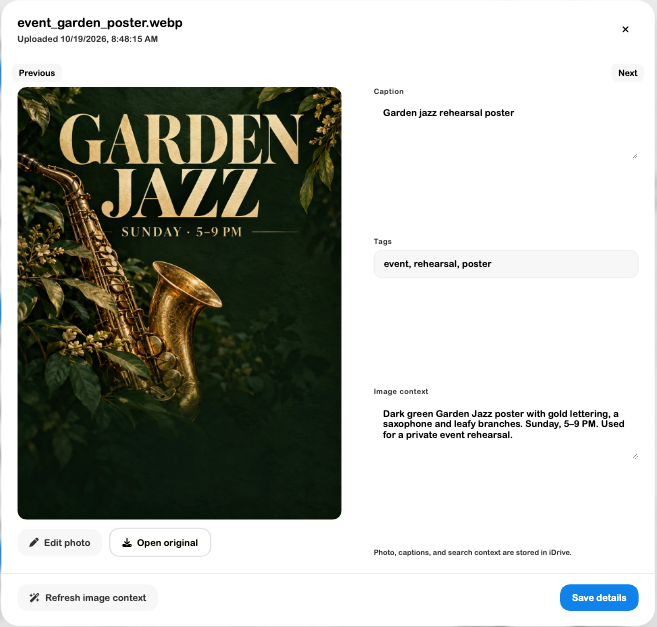
- Select the intended business and open Photos. Wait for the images and thumbnails to load before deciding that an item is absent.
- Select the image and use Open. Check the actual visual content before writing its caption.
- Add a short descriptive Caption and useful comma-separated Tags. Describe the image accurately; do not add people, conditions or events that are not visible or established.
- Use Image context for helpful additional description. The demonstrated description was entered manually. Generate caption & context or Refresh image context needs the connected AI service to succeed.
- Choose Save details and wait for completion. Reopen the image after a reload to confirm the stored fields.
- Check the intended destination separately before adding the image to a public offer, site or post. A library save does not publish that destination.
Review a group of images
Use Group photos to organize by day or month. Capture time is used when available; otherwise upload time supplies the date. Do not treat an upload date as proof of when a job occurred.
Select images to reveal Move, Copy, Download, Tags & links and Archive. Select loaded affects the loaded set, not every unseen page. Tags & links can add tags and associate the selection with a project or work order while retaining existing associations. Check the exact selection and record before submitting.
The reviewed library loaded 15 image records and the actual detail editor; the poster's metadata persistence was tested. Bulk photo reassignment, crop/edit persistence, a large-library performance test and AI caption generation were not exercised. Selected-file ZIP download and archive recovery were tested separately in Cloud Files.
Document Scanning
Receipt scanning prepares the image for review; it does not establish that a purchase occurred or that extracted amounts are correct. Start from Expenses → Add Expense → Scan Receipt. Choose Image also accepts a receipt photo; an existing expense's receipt picker has Scan receipt and Choose photo actions.
The scanner can use a device's native scanner when supported and fall back to the in-app scanner. Browser camera access requires permission. In this browser the live camera was unavailable, so the review used the scanner's Library input with a prepared sample image.
Inspect the document boundary
- Hold the receipt flat with all edges visible, or select a suitable existing image through Library.
- Wait for document detection and inspect the result. A crop is not proof that every line is readable.
- Open Corners to check the boundary against the paper. Where needed, drag the corners to include the complete document and exclude the surrounding surface.
- Choose Apply and check the cropped result. If detection is uncertain, review the full image instead of assuming the automatic boundary is correct.
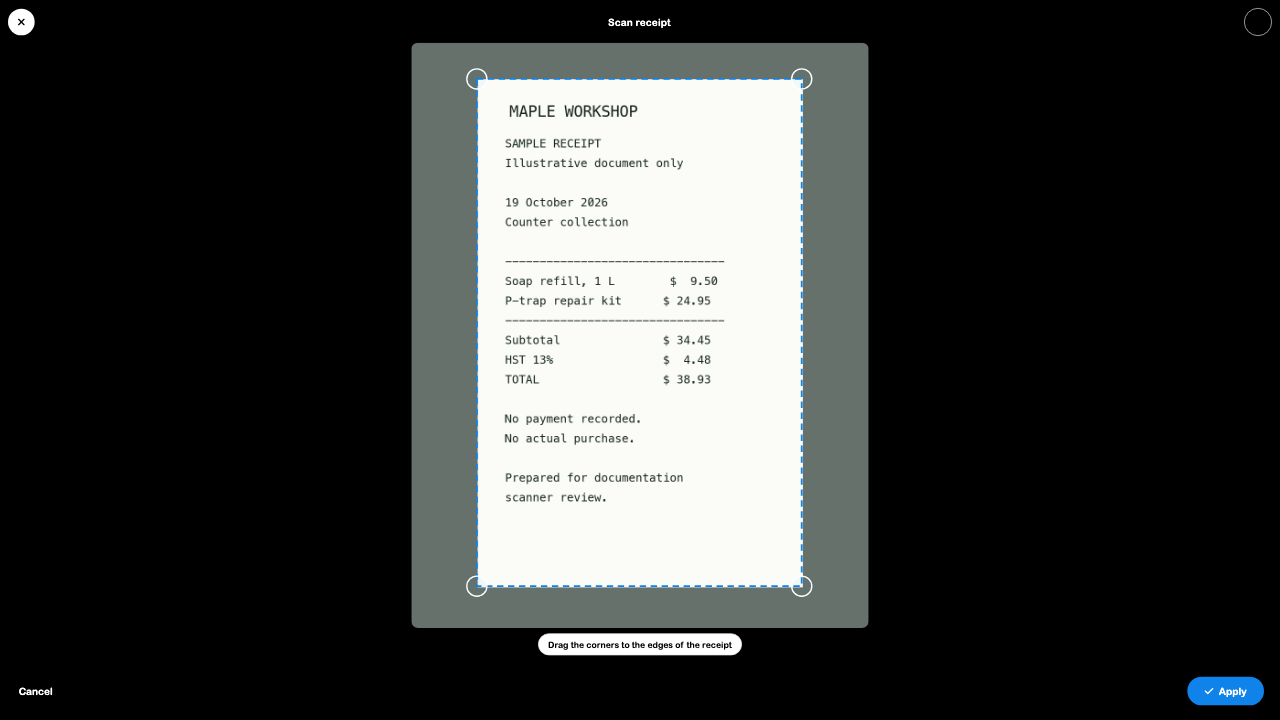
Compare readability before using the scan
The browser scanner offers Auto, B&W and Color, plus Corners, Retake and Use scan. Compare the cleanup result with the original. Enhanced contrast is useful only when it preserves the information you need.
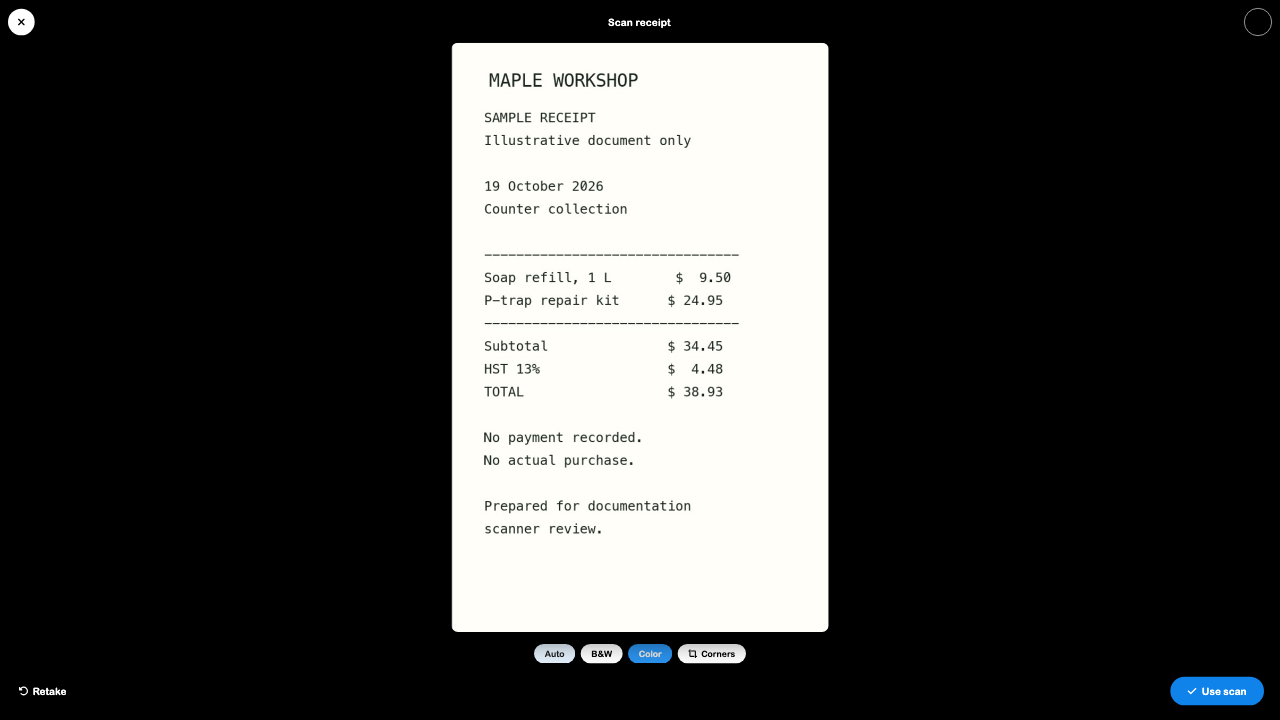
In the reviewed sample, Auto introduced uneven shading; Color gave the clearer result. Choose the mode by reading the output, not by assuming automatic cleanup is always best. Confirm the supplier, date, line items, tax and total remain legible.
Use Use scan only after review. When adding an expense, the next workflow can analyze the image and present fields for review. Check extracted details, category and payment information before saving the expense. A cropped image, successful AI extraction and a saved expense are different outcomes; see Expenses.
The imported-image path, detected boundary, Corners → Apply and Color preview were exercised here. Dragging individual corners, live camera auto-capture, native device scanning and expense extraction/save from this sample were not tested. The sample explicitly states that no actual purchase or payment is recorded.
Operational camera use
The Camera workspace also supports capture and QR workflows. Check which mode you are using and what the recognized code would do before confirming. Ticket check-in, inventory lookup, terminal sign-in and ordinary links have different effects.
Captured operational photos can be directed to an image folder or a selected work order. The receipt destination hands images into the expense workflow. Review the selected business, destination and upload completion; a locally captured photo is not proof that the intended record received it.
These live-camera and QR completion paths were inspected in source only for this review. No ticket was checked in, login code scanned, work-order photo uploaded or camera/robot depth capability demonstrated. See Events, Inventory and Devices for the related records.
Troubleshooting
| Symptom | What to check |
|---|---|
| Camera is unavailable | Review permissions and device support, or use the scanner's Library input for an existing document image. |
| Automatic crop misses text | Open Corners and inspect the full boundary; keep the original when the result is uncertain. |
| Auto cleanup reduces readability | Compare B&W and Color against the source before using the scan. |
| A caption disappears | Wait for Save details to complete, then reopen the same image in the same business. |
| Context generation fails | Inspect the displayed service error. A successful upload or manual metadata save does not prove AI availability. |
| Image is present but not in the intended job | Review destination and association separately from the image's existence in storage. |
Continue with Files, Expenses, Projects and Website.
Keep capture and upload states distinct
Recent capture workflows support retaining material through temporary offline periods, linking photo evidence to operational work and native sharing where the app supports it. Check whether an item is saved locally, waiting to upload or available in the business library before closing or clearing the app.
Open the intended work order or project when adding evidence so it is attached to the right record. A thumbnail or native share sheet is not proof of completed cloud upload. Browser inspection does not validate offline recovery or native-device capture; check the final saved record on the device used for the job.