Terminal
Terminal connects the cashier's item selection with bills, payment review, and the business's other work. A useful setup starts with the right business, a saved menu, accurate selling prices, and clear staff permissions.
The example below uses a workshop menu with CAD $9.50 hand soap and a CAD $24.95 repair kit. The $34.45 subtotal + $4.48 HST = $38.93 cart was saved as an unpaid bill, split by item, and merged again. Cash change was reviewed and cancelled. No sale, card charge, refund, printer command, or customer message was completed.
Terminal POS
- Open Terminal, or choose Terminal → Open with this menu from a menu dashboard.
- Check the selected business and menu. If the grid is empty, use Select Menu or Settings → Connected menu.
- Add products from the grid. Review quantities in Cart; use the plus, minus, and remove controls to correct them.
- Check subtotal, tax, fees if applicable, and the final total. A menu price is separate from the inventory item's stock amount.
- Choose the appropriate tender only when the order is ready. A populated cart is still unpaid.
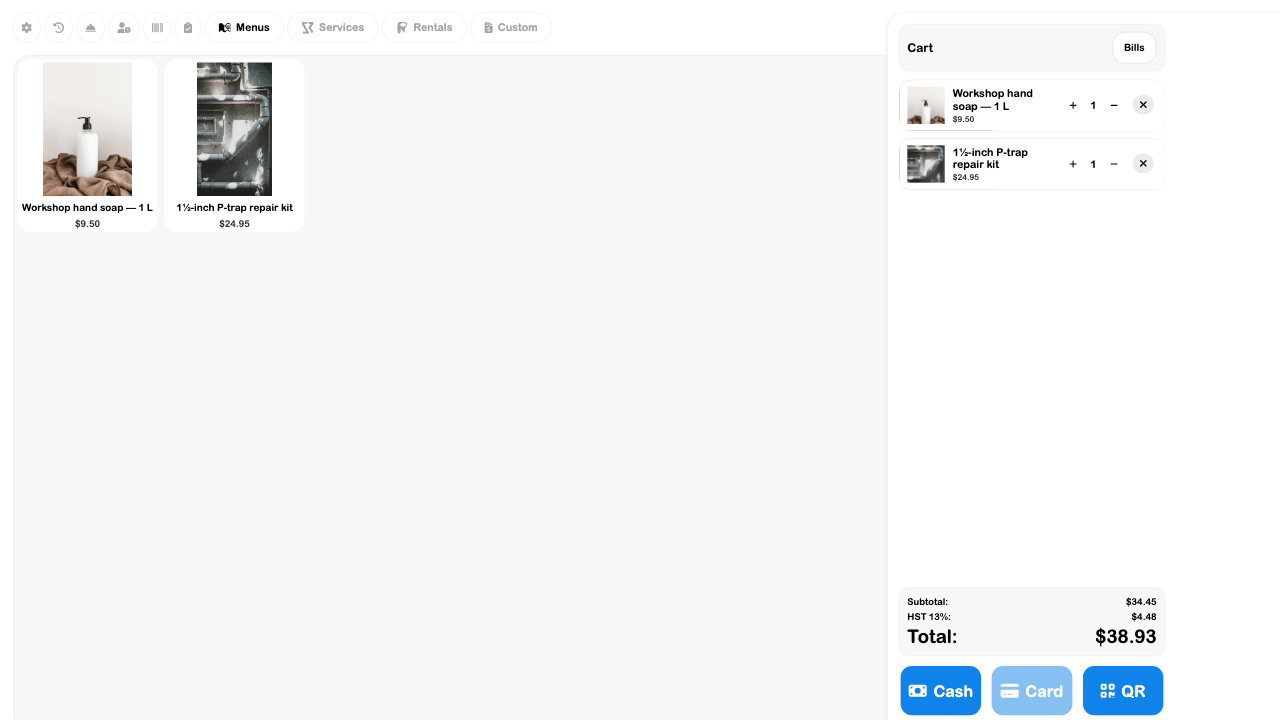
Offering tabs depend on the terminal setup and available records. Menus, Services, Rentals, and Custom were visible in this example. A service opens its work-order flow rather than behaving like an ordinary menu product.
The first-run walkthrough temporarily uses demo settings, then restores earlier demo and card settings when skipped or completed. Check the actual DEMO MODE indicator after leaving it; do not assume that the terminal remains in demo mode. Demo checkout is practice and does not prove live payment readiness. Bills and other setup actions have their own persistence, so demo mode should not be treated as a sandbox for every action on the page.
Open bills
A bill keeps an unpaid selection available while the cashier handles other customers. Use a recognizable name such as “Workshop collection” rather than leaving several indistinguishable carts.
- Add the intended products, then choose Bills → New Bill.
- Enter a bill name and choose Start with Cart to include the current free cart, or Start Empty.
- Open the bill to continue adding items. Its name and Bill badge identify which tab owns the current cart.
- Return to Bills to park it and work elsewhere. Reopen the same bill before checkout.
A loaded bill owns its cart. Starting another bill does not copy the loaded bill's contents. Bills are shared within the business and support cached offline work; an offline label means a change still needs to sync. Check that it disappears before relying on another terminal to see the update.
Bill cards show line totals; the payable cart calculates its tax and tender total. In this example the bill card shows $34.45, while checkout shows $38.93 including HST. Do not mistake the card's item subtotal for the final payment amount.
Split bills
Choose Split into separate bills on a bill card. There are two distinct methods:
- By items: assign every unit to a bill. Drag a line into a group, or tap an unassigned line to move it to Bill 1 and tap it again to move it onward. At least two groups must contain items.
- Even amounts: choose the number of shares, from 2 to 12. This creates amount-based share lines and keeps the original item summary in the notes.
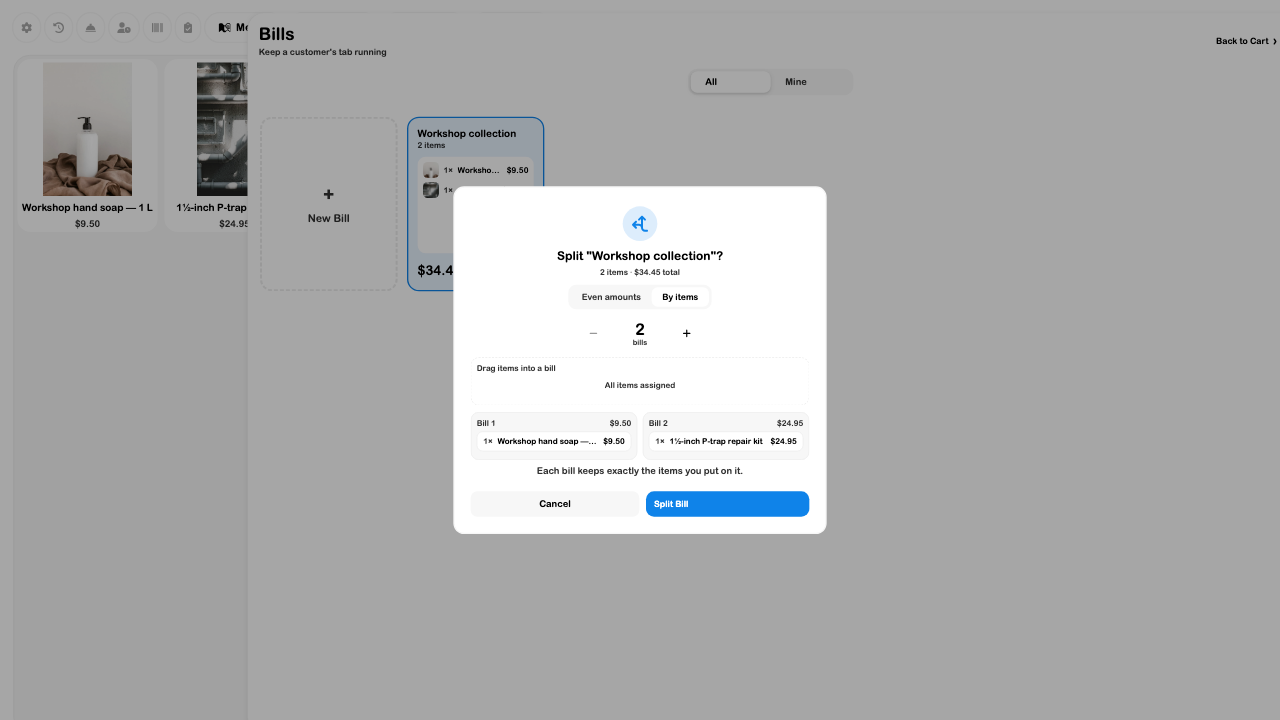
The by-items example was saved successfully. Even splits distribute remainder cents, so shares can differ by one cent; the dialog's rounded “each” preview is not a promise of identical amounts. Review each resulting bill and its checkout tax. Previously paid online lines remain marked paid and are excluded from amounts still due.
Merge bills
Hold a bill card to enter selection mode, select the other bills, then choose Merge bills. Confirm that the selected names belong together first: merging creates one bill and removes the source bills.
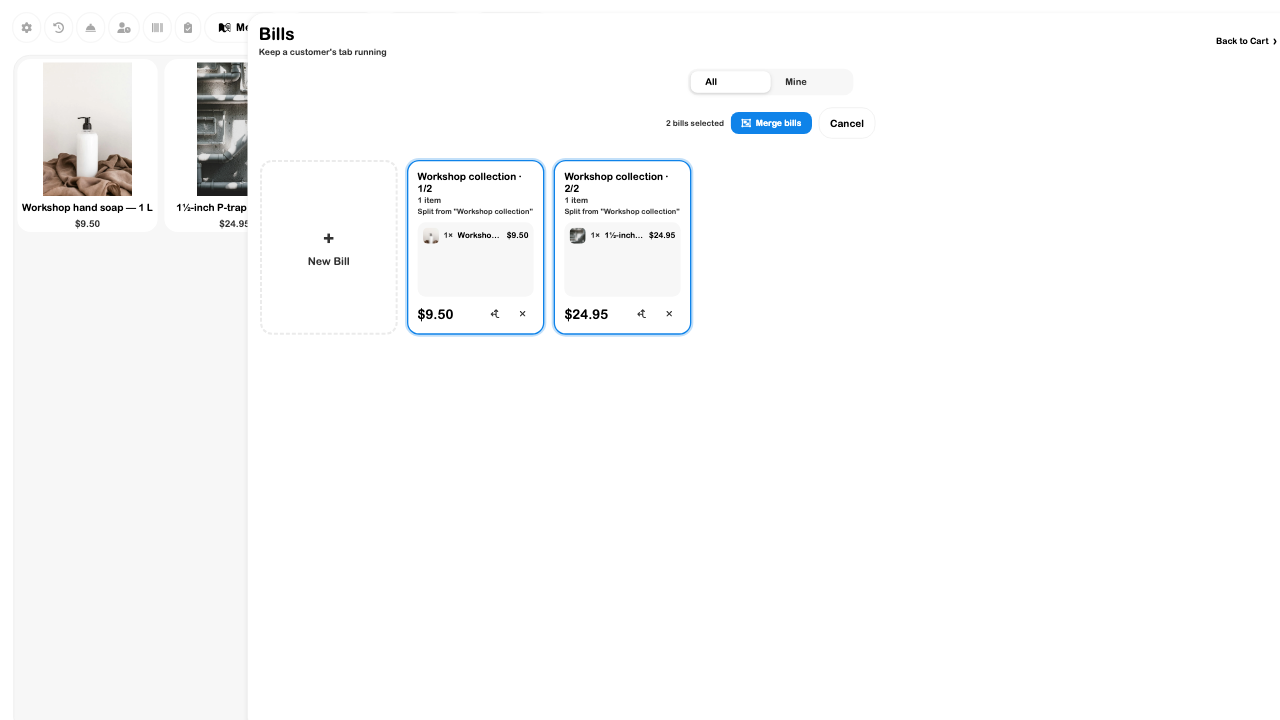
Merging preserves item lines and their recorded history. Seat-linked bills retain the seats they cover. Paid online items remain visible as paid; they must not be collected a second time. Reopen the merged bill and verify its quantities and amount before choosing a tender.
Custom charges
Use Custom for a specific one-off charge that does not need a permanent menu item—for example, fitting a customer-supplied replacement washer.
- Enter a descriptive name and optional explanation.
- Enter a positive amount using the amount field or keypad.
- Review the name and amount, then choose Add to Cart.
- Review the resulting cart total and applicable tax before payment.
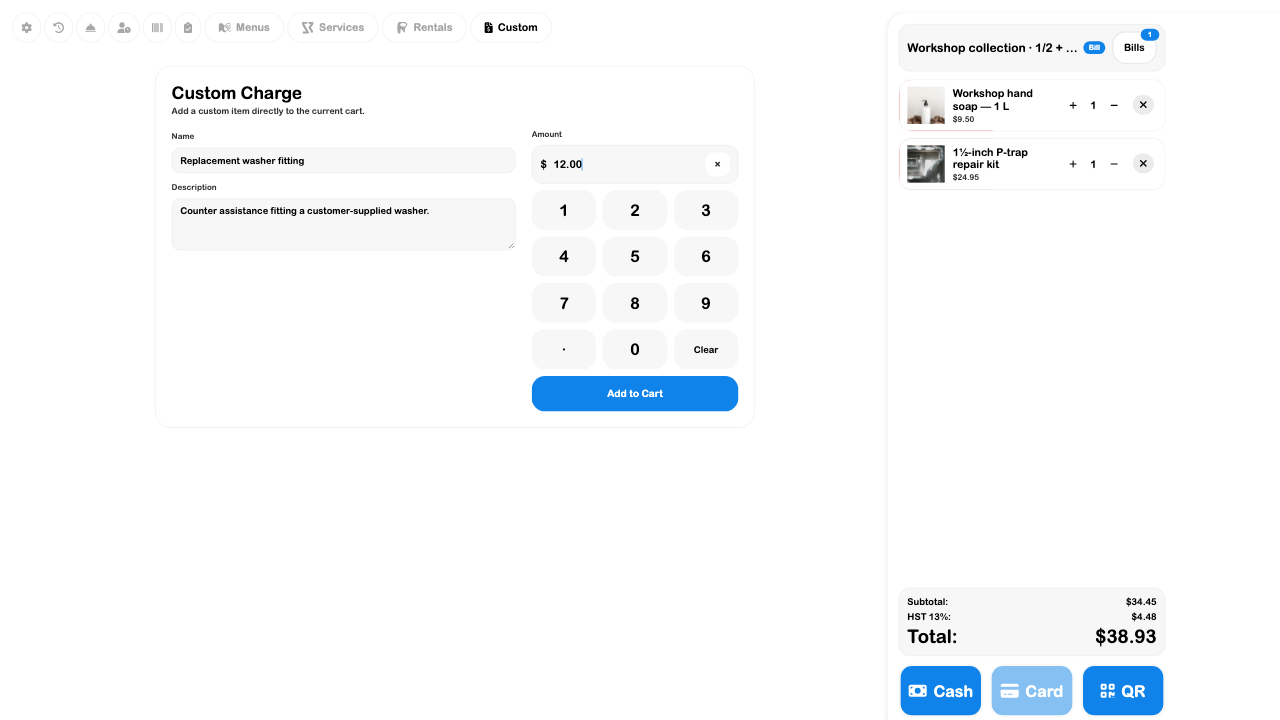
Invalid money values are rejected and unusually large amounts require an extra review. A custom line is not a catalog stock item; use a real menu product when you need its inventory or recipe tracking.
Cash payments
Cash opens the amount-collected view. Use denomination tiles or manual entry to describe what the customer handed over. Review the change due before choosing Complete.
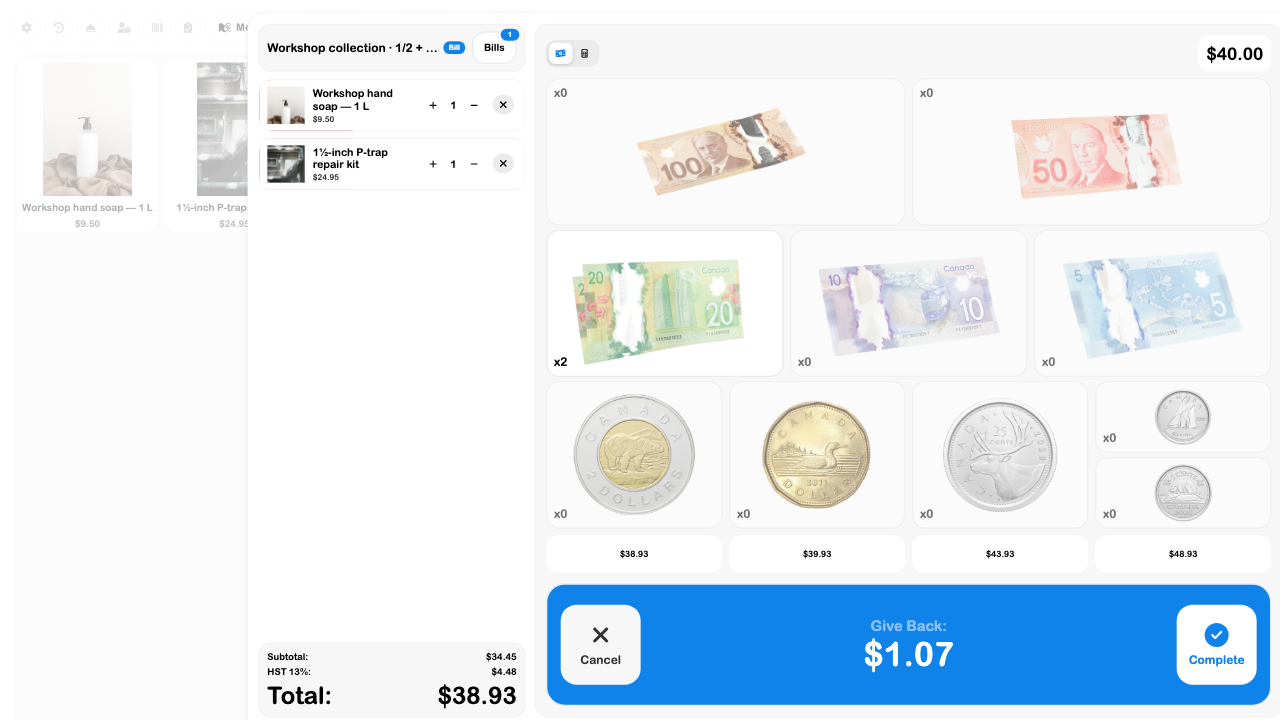
Completing cash checkout records a sale; it is not just a calculator confirmation. Check business and menu currency first. If payment was cancelled, verify that the unpaid bill is still available. A cash drawer is separate hardware and must not be assumed to open simply because the cash screen works in a browser.
Card payments
Card checkout needs the business's Stripe connection, an enabled card tender, the appropriate reader or native Tap to Pay setup, and any device payment permission. A menu allowing cards does not create those connections.
- Connect the intended Stripe account in Integrations.
- Open Terminal → Settings → Card reader and select the configured reader, or use the native Tap to Pay path where available.
- Review the menu's card switch and processing-fee setting, plus the terminal's own tender settings.
- Verify the final amount before starting payment. Wait for a confirmed result before treating the bill as paid.
In the inspected business, Card was disabled and Card reader directed to Integrations because Stripe was not configured. No reader connection or card payment was tested. Do not select a physical reader solely to explore: selecting one can also apply its configured cover screen.
Tap to Pay
Tap to Pay uses a compatible native iOS or Android app, the connected Stripe business, and a Stripe location. A narrow browser layout is not a native Tap to Pay device.
After connecting Stripe, select Tap to Pay where offered in Card reader settings and choose its Stripe location. Follow the native collection prompt and inspect the confirmed transaction in payment history. If no location is listed, review the Stripe location setup.
The browser payment path explicitly rejects native Tap to Pay. Device compatibility, native prompts, and actual contactless collection were not tested for this guide. Use the intended native device for that readiness check.
QR checkout
QR checkout lets the customer pay the current cart on their own phone. It is separate from a receipt QR code, which opens details of an already recorded transaction.
- Check the terminal's Enable QR checkout (pay on phone) setting and the menu's QR setting.
- Review the cart and select QR. The terminal creates a time-limited payment session for that cart.
- Let the customer complete payment on their phone. Keep the terminal's session open while it waits for confirmation.
- Treat the sale as paid only after the terminal confirms the verified payment result. Cancel or restart an expired session rather than reusing it.
QR checkout is unavailable in demo mode and needs the device's card permission where permissions are applied. A visible QR button alone does not prove Stripe readiness. No payment session or customer QR was created in this audit; session expiry, phone checkout, and payment confirmation remain integration checks.
Receipt printing
Receipt printing requires supported terminal hardware and a connected printer. Browser payment review does not establish that a printer is present.
On the supported Android terminal, review Settings → Hardware → Receipt Printer, its connection state, and the auto-print option. Receipt handoff controls the receipt review experience; Receipt QR code controls whether the receipt includes a link. These are separate from the printer connection.
After an authorized completed sale, inspect the receipt and use the available print action if needed. Automatic printing runs only with a connected printer and the appropriate auto-print setting. Keep a failed print separate from a failed payment: inspect payment history before attempting to charge again.
Printing and physical receipt output were not tested. The browser hardware implementation reports that printing is unavailable, so there is no fabricated printer-success screenshot here.
Order history
Choose Payment History to inspect recent transactions for the selected business. It includes cash, card, online-card, and bank payment types where present, not just today's current cart.
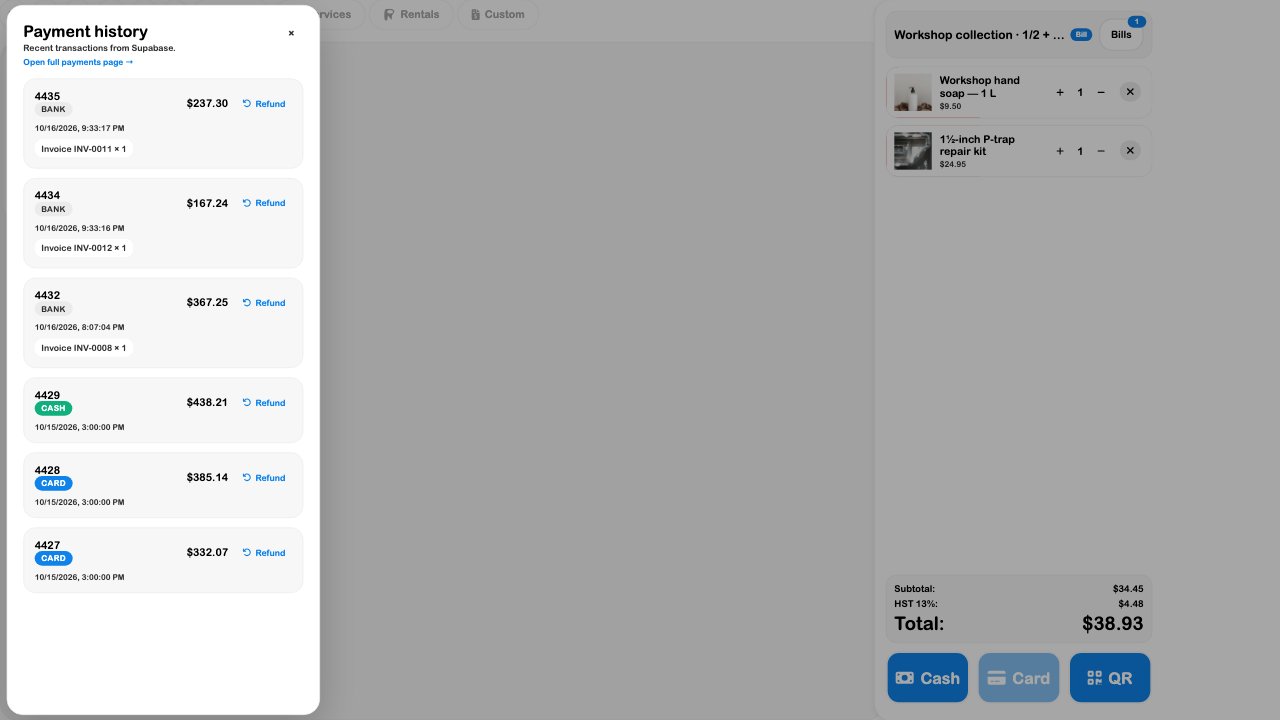
Inspect the record's time, amount, type, and item information; open a receipt or Open full payments page for more detail. Scrolling loads more history where available. Refund controls depend on permissions and payment state. Opening history does not authorize or perform a refund.
If a payment is missing, check the business profile, connection, and any queued transaction indicator before retrying the sale. See Payments for report and reconciliation details.
Mobile POS
On a narrow screen, Terminal uses icon-based offering controls and a lower cart area. Use Terminal settings for setup and the bill control to switch tabs. Check the item quantity, tax, and final amount before selecting the bottom Cash, Card, or QR action.
The 390-pixel browser layout was inspected with an actual populated cart and no horizontal document overflow. Product names truncate in the compact grid, and thumbnails were compressed in the inspected layout; open the item or review the cart rather than relying on an abbreviated label. A mobile browser check does not verify native readers, Tap to Pay, printers, or a physical device.
Terminal floor plans
A floor plan lets staff open bills from tables and seats rather than searching a list of names.
- Create or save a suitable layout in Layouts.
- In Terminal, choose Settings → Bills floor layout and select the saved plan.
- Open Bills → Layout View. Use zoom and fit controls to inspect the floor.
- Tap a table or seat to review or start its bill.
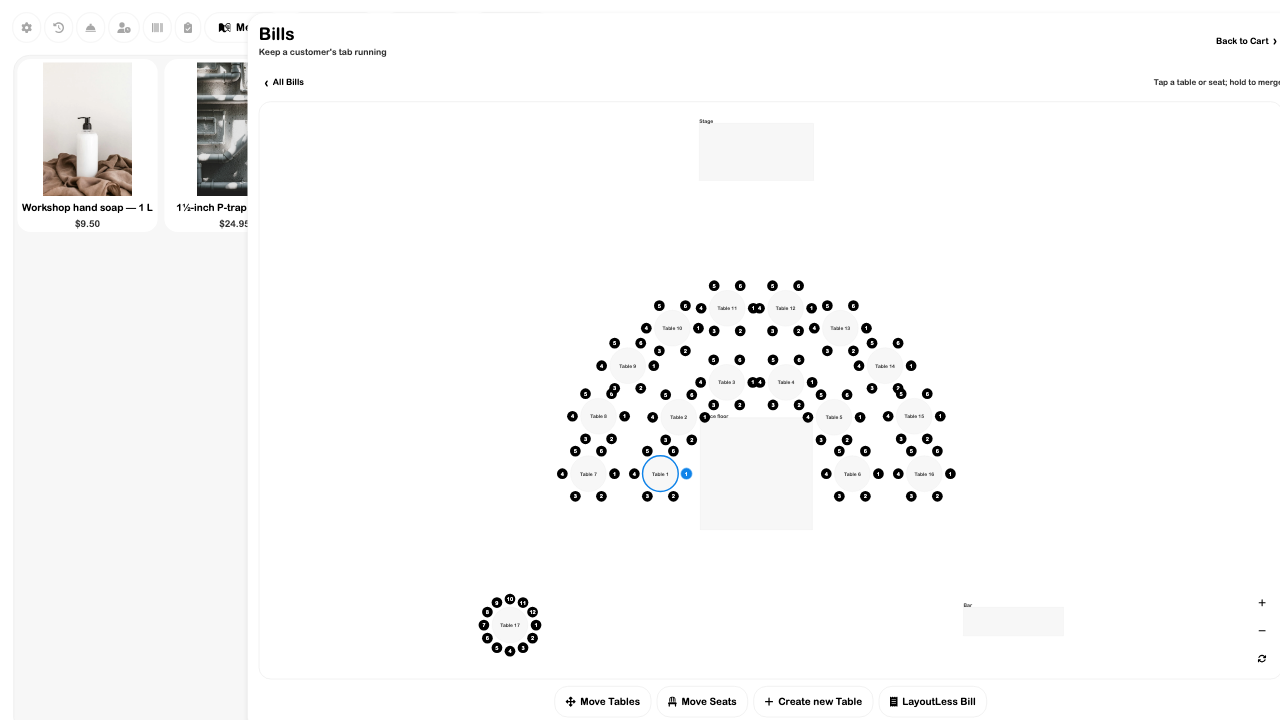
The selected floor is cached for this business on the terminal and works across menus. Move Tables, Move Seats, and adding tables create a local operating arrangement; they do not rewrite the original saved layout. Use the revert option to discard local rearrangements, or Remove layout in settings to return to plain bill names. Multi-floor plans have floor tabs when available.
The example's plan selection was returned to None after inspection. No venue booking or public layout was changed.
Table and seat bills
Tap an unused seat to choose between Whole Table and Seat … Only. If a bill already occupies that spot, Terminal opens it instead. Add the order only after checking the bill name.
The inspected Table 1 · Seat 1 bill was created, populated with one soap, and showed $10.74 including HST. No payment was completed. Returning to the floor highlighted that seat.
An open bill determines occupancy; a drawn seat alone is not a reservation. Split shares keep the original spot, so the table remains occupied until all relevant bills are settled. Merging seats can cover several seats with one tab. Review which seats a bill covers before taking payment or deleting a tab.
Service orders at the till
A service may need intake answers, photos, location, scheduling, and a quote before it has a payable line. Selecting a service opens its configured flow rather than simply adding its name to Cart.
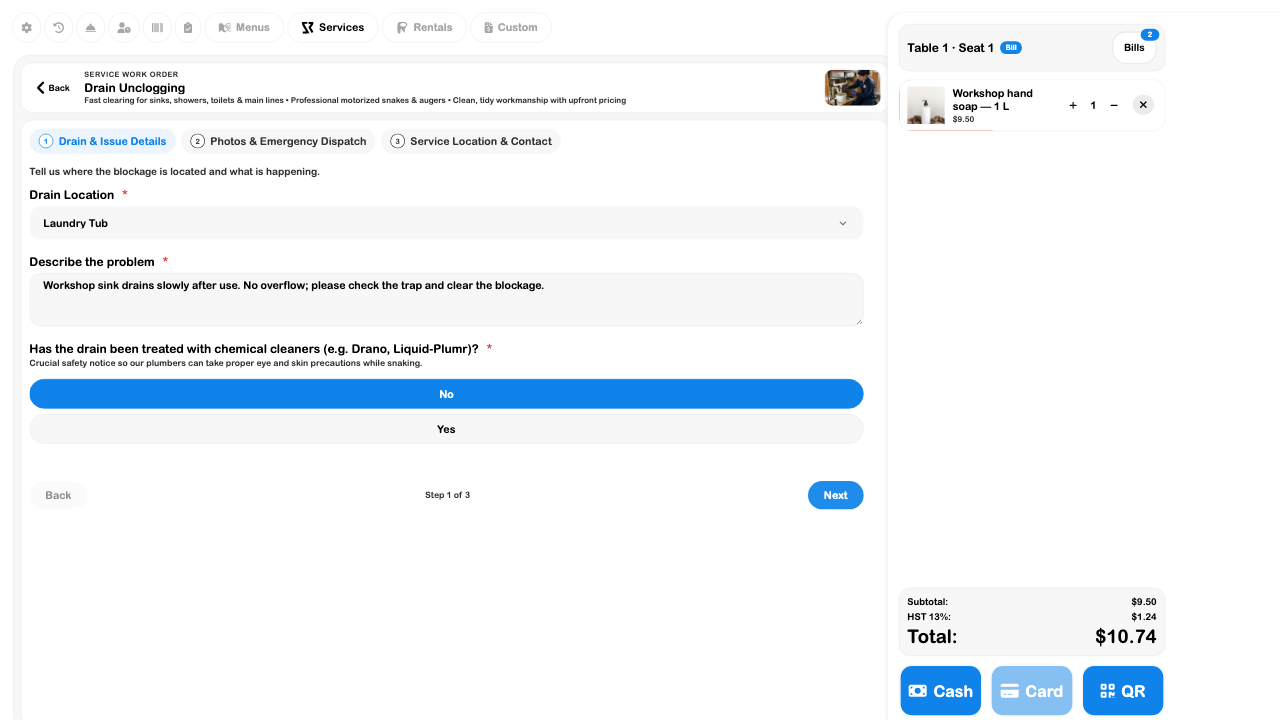
- Choose Services and select the service.
- Complete its required fields and review each step. The exact questions and price depend on the attached flow.
- Check the resulting service details and amount before adding or completing the service order.
- Review the cart and work-order result before payment.
A missing flow produces a configuration error; fix the service's flow instead of substituting an unexplained custom charge. Map-created service drafts have an additional save boundary that can create a work order before payment. Do not treat a running service flow as a harmless preview: finishing it can save operational data. This audit checked only a filled first-step intake, then exited.
Online order management
The Online orders drawer handles incoming menu orders. Configure menu ordering, fulfillment locations, menu eligibility, and staff permissions first.
A new order can require approval within its displayed acceptance window. Accept is an operational decision: for a card order it captures the authorized funds; for cash, payment remains to be collected in person. Declining or expiry normally releases an uncaptured card hold. A hold and a completed payment are different states.
Accepted table orders can attach to a Terminal bill. Card-paid lines are marked PAID and excluded from the amount still payable; cash lines remain due. Review that distinction before collecting at the table. Keep any payment-conflict or reconciliation message visible and resolve it before retrying acceptance.
The drawer supports live and completed orders, and authorized staff can progress accepted orders to preparing, ready, and completed. These transitions can notify the customer. The actual acceptance, card capture, notifications, and fulfillment transitions were not exercised here; this section describes the implemented workflow without claiming an end-to-end order test.
Order preparation
Use the online order's status to tell the team what is happening, and the saved recipe to tell the preparer how to make it. Those are separate tasks.
For an accepted order, review quantities, variants, fulfillment method, location, table or pickup details, and instructions. Move it to Preparing, then Ready when the order is actually ready, and Completed after handoff. Ready can notify the customer; do not use it to explore the interface.
The separate recipe guide at Preparation lets staff choose an item and portions, follow its ingredient list, and advance through preparation steps. It does not itself advance an online order's status. Preparation instructions explains the stock-use distinction: Terminal sales already deduct linked ingredients, so standalone recording must not count the same preparation twice.
The saved recipe guide was inspected with three portions through its completion review. Online-order preparation and customer notifications were not performed.
Terminal stations
A station lets a shared screen act as a named business device while staff switch in using their own permitted access. Configure the device's permissions, menus, idle lock, and allowed staff in Team → Devices.
- As an owner or authorized manager, open Settings → Features → Use this terminal as a device.
- Enter a clear device name, such as “Workshop counter.”
- Review the sign-out notice. Choosing Use as a device registers this screen and signs the manager out.
- Review device permissions in Team → Devices and verify staff sign-in on the actual terminal. Use Manager sign-in to return to management work.
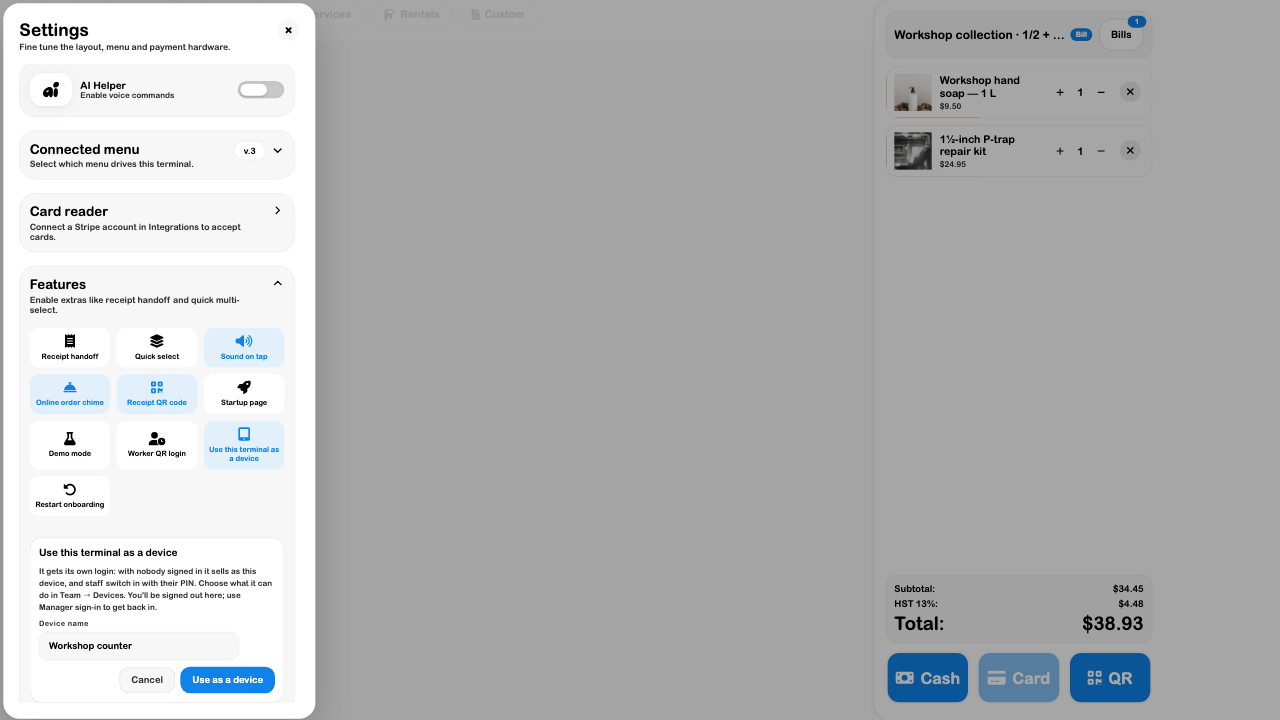
Device identity and a staff session are separate. A station can have restricted actions even when the manager's ordinary account can do more. Pairing, native device login, idle locking, and staff switching require an actual device test; the setup draft alone does not prove them.
Troubleshooting
| Symptom | Check |
|---|---|
| Empty item grid | Correct menu, saved version, categories, and permitted offering types. |
| Wrong price or tax | Menu selling price, variant choice, tax category, currency, and fee settings. |
| Bill missing elsewhere | Business, All/Mine filter, connection, and pending offline sync. |
| Bill card and checkout differ | Bill line subtotal versus calculated tax and tender total. |
| Split button is disabled | Assign all units and populate at least two groups for a by-items split. |
| Card is disabled | Stripe connection, selected reader/location, native compatibility, and device permissions. |
| QR cannot start | Demo state, menu/terminal QR switches, card permission, and payment-provider readiness. |
| Printer fails | Actual connection and supported hardware; verify payment before retrying a charge. |
| Service cannot load | Configured flow and access to its referenced forms and records. |
Continue with Menus, Payments, Services, or prepare a counter menu.